Tasks from failed runs
Failures become tasks in two ways: automatically, one task per failed test case when a pipeline run ends, or by hand with the Task button in Report. This page covers both, and what happens to a task outside SmartestQA.
In short
On this page you can
- Create a task for every failed test case of a pipeline run, without lifting a finger.
- Read the failed steps, errors, duration and screenshot inside the automatic task.
- Jump from the task to the run with Go to Report.
- Raise a task by hand from a failed test case in Report, and send tasks to Jira.
How to use it
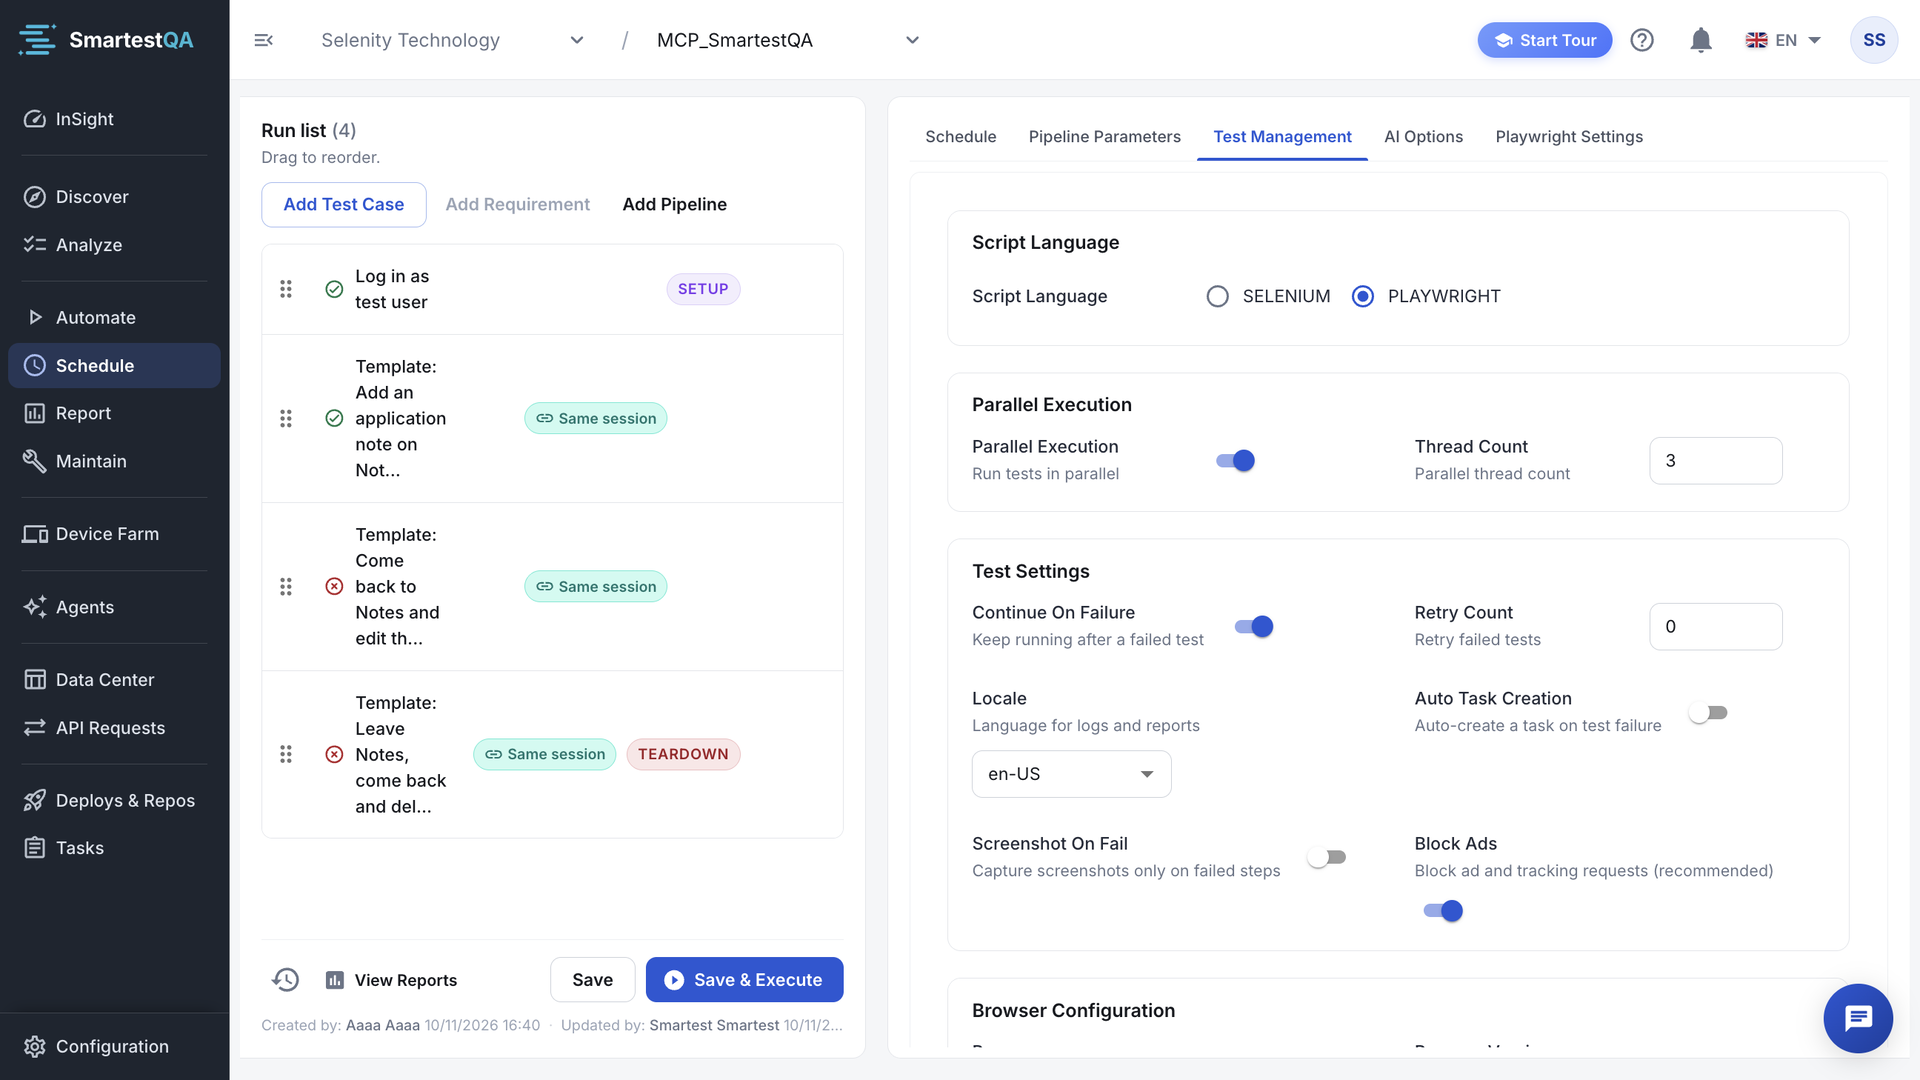
- In the pipeline’s settings, switch on Auto Task Creation under Test Settings.
- Let the pipeline run; when it finishes with failures, tasks appear in Open.
- Open a task, read the report in the description, click Go to Report.
- Rename it to the real problem, add Members and move it on.
Automatic tasks for failed runs#
Open the pipeline’s settings
In Schedule, open the pipeline you want to watch and go to its Test Settings.
Switch on Auto Task Creation
Tick Auto Task Creation (“Auto-create a task on test failure”) and save the pipeline.
Let it run
Run the pipeline, or wait for its schedule.
When the run has finished and at least one test case failed, each failed test case gets a task named “[Auto] Test Failed: test case” in Open.
- When: once per run, after its last test case has finished. A run that is still going creates nothing yet.
- How many: one task per test case result with the result Failed. Passed, stopped and skipped test cases create none.
- Every run again: SmartestQA does not look for an existing task. A test case that fails in three nightly runs creates three tasks. Switch the option off for pipelines that are red for a known reason.
- Only pipeline runs: dry runs in Automate never create tasks.
Which switch counts#
The same option exists in two places:
| Where | Label | Applies to |
|---|---|---|
| The pipeline’s settings in Schedule, Test Settings | Auto Task Creation | That pipeline. Default: off. |
| ConfigurationProject PanelTest Management, Test Settings (Admins) | Auto Task Creation | Pipelines that have no value of their own. Default: off. |
if the run's pipeline settings contain Auto Task Creation → use it (on or off)
else                                                     → use the project's Auto Task Creation
off → no task
Example: the project setting is on, the nightly pipeline’s own switch is off. A failed nightly run creates no task, because the pipeline’s own value wins. Every pipeline saved in Schedule stores its own value, so switch it on in each pipeline that should create tasks. The project setting matters for pipelines created without one, for example through the API.
What an automatic task contains#
| Field | Value |
|---|---|
| Name | “[Auto] Test Failed: ” + the test case name |
| Status · Priority · Type | Open · Medium · Functional Bug |
| Reported By | Automated Tests |
| Members | None (Unassigned) |
| Attachments | The run’s screenshot, when one was taken, as the first file |
| Link | Go to Report at the bottom |
The Description is a read-only report in tables:
| Table | Contents |
|---|---|
| Automated Test Failure | The title band. |
| Test Information | Pipeline, Test Case, Start, End and Duration (2m 14s). |
| Step Summary | Total, Passed, Failed and Success (%). Formula. |
| Failed Steps | For each failed step: number, step name (page name and step number, for example checkout #7) and the error, cut after 200 characters. |
| Passed Steps (n) | The steps that passed. |
| Error Details | The test case’s error log. |
You can change every field except the description. Rename the task when you know the cause, so the board reads as problems, not test names.
Go to Report#
Automatic tasks have a Go to Report link next to the task number at the bottom of the window. It closes the task and opens that run in Report. If the run’s report was deleted you see “Report not found.”
Raise a task from Report#
Open the failed test case
In Report, open the run and the test case with errors.
Click Task
Next to the AI analysis button, click Task (tooltip “Create a defect task”). It appears only when the test case has errors.
Fill in and save
The same task window opens, empty. Write the name and description, set members, click Save.
“Task created successfully. You can check it on the Tasks page.”
A task raised this way is not linked to the run: it has no Go to Report link. Paste the report’s address and a screenshot into the description. If something is missing: “Please fill in all required fields.” If saving fails: “An error occurred while creating the task. Please try again or continue the process from the Tasks page.”
Jira and Azure DevOps#
Both are set up in Integrations by an Admin; this is what they do with tasks.
- Jira, with Send Tasks to Jira on (“New task are automatically created as Jira issues”): saving a task in Tasks creates a Jira issue; later changes update that issue. An automatic task is sent the first time someone changes it.
- Azure DevOps has its own option, “Send tasks to Azure DevOps”, in its integration.
Problems with the Jira or Azure DevOps connection never block saving a task in SmartestQA.
Notifications#
| Event | Who hears about it |
|---|---|
| You add someone to Members | That person, in SmartestQA’s notifications (not you, if you add yourself). |
| You @mention someone in a comment | That person, if they are in your company. |
| A task is created (by hand or automatically) | Teams or Slack channels set up for the project in Integrations. |
| A task’s priority changes to Critical | The same Teams or Slack channels, as a critical alert. |
Clicking a task notification in SmartestQA opens the task.
If something goes wrong#
Didn’t find your answer?Write to support with your project name and what you see on screen.
info@smartestqa.ai