Build a pipeline
A pipeline is built on its own page: the run list on the left, the settings on the right. This page covers the run list, from the first click on New Pipeline to deleting a pipeline you no longer need.
In short
On this page you can
- Create a pipeline with New Pipeline; it is saved at once.
- Fill the run list with Add Test Case, Add Requirement or Add Pipeline.
- Drag rows into run order and mark rows as Setup, Before, After or Teardown.
- Let a case continue in the previous case’s browser with Same session.
- Tag, save or delete the pipeline.
How to use it
- Click New Pipeline and type a Name.
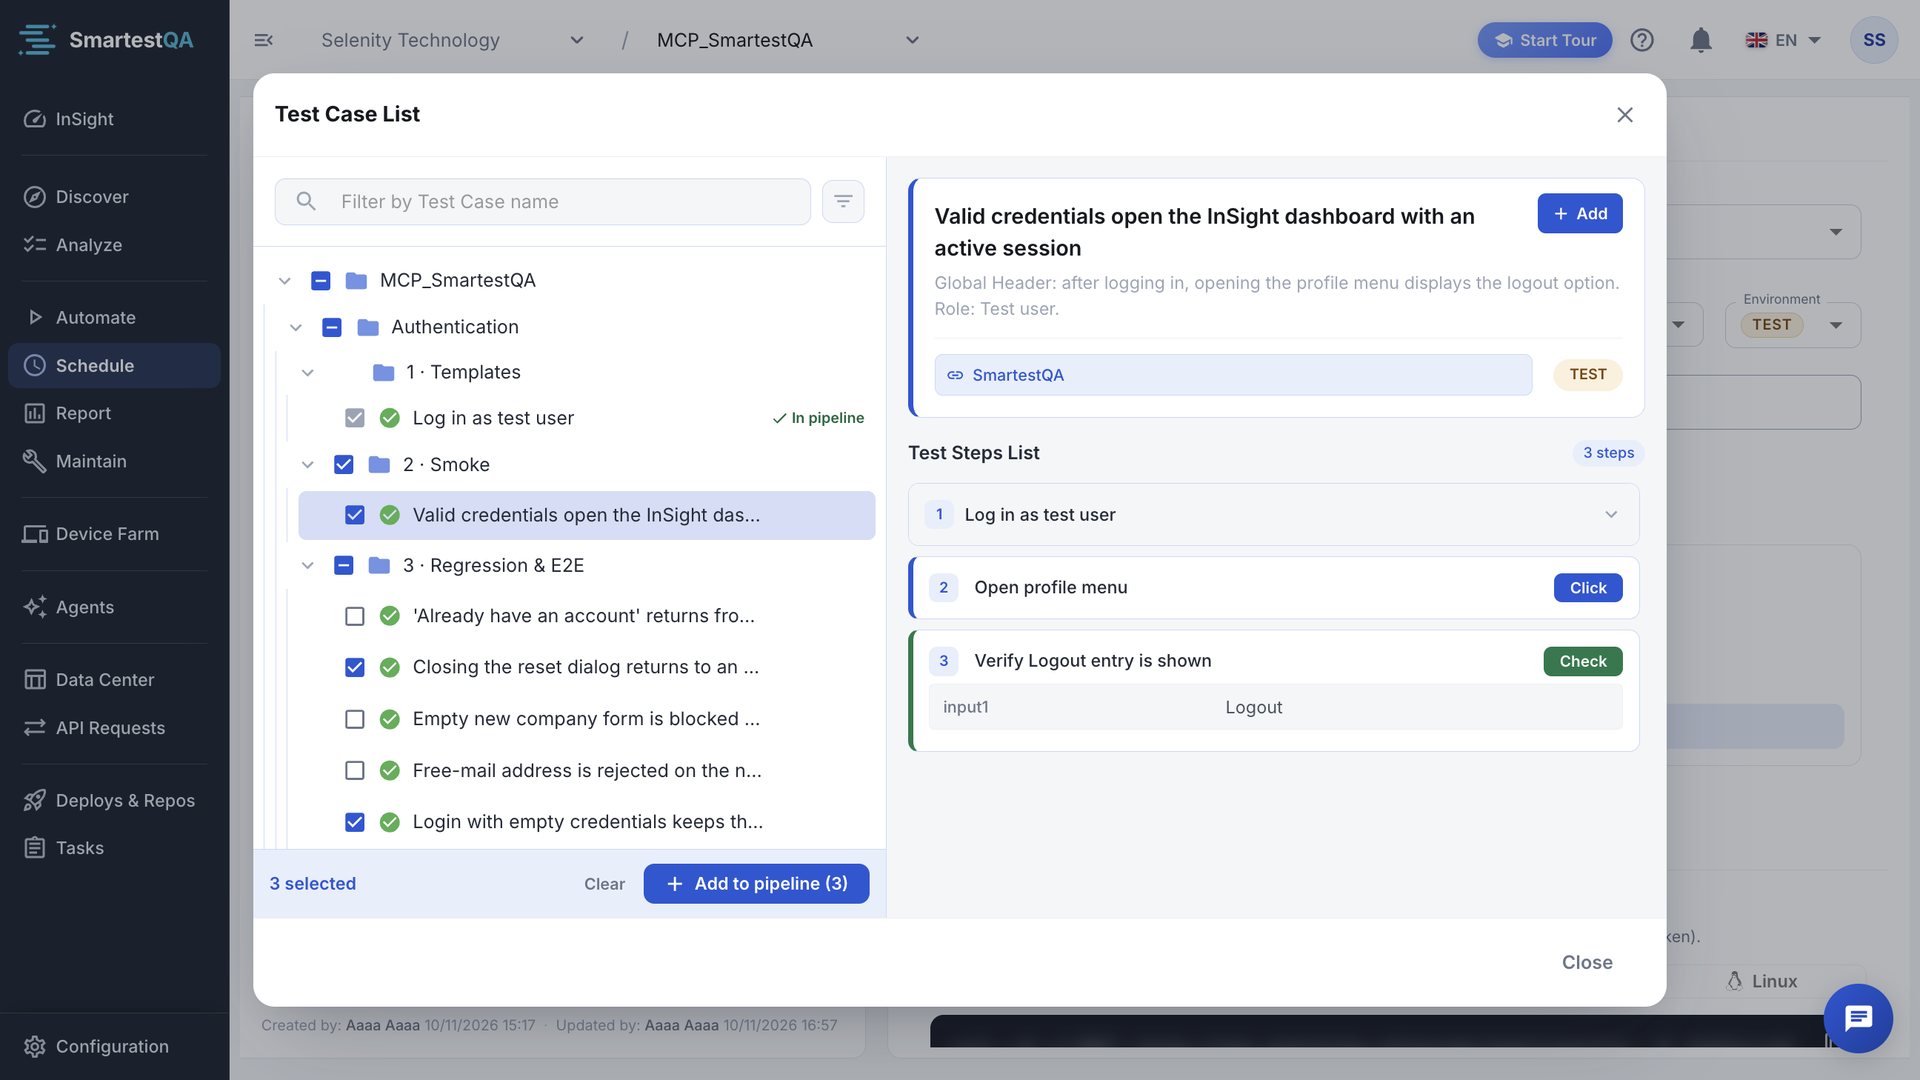
- Click Add Test Case, tick cases or a folder, click Add to pipeline (n).
- Drag rows by the handle; click a row’s phase chip to make it Setup or Teardown.
- Check the Schedule tab, then click Save or Save & Execute.
Create a pipeline#
Click New Pipeline
In SchedulePipelines click New Pipeline at the top right. SmartestQA creates the pipeline immediately and opens its page. With no project selected the button is disabled (“Please select a project”).
The pipeline exists from the first click
Each click creates a pipeline and adds one to your company’s pipeline counter, even if you leave the page empty. Deleting it does not give the count back. Your company’s licence can limit how many pipelines you create; an Admin sees it in Company Settings › Billing.
Name it
Type a Name in the Schedule tab. It is the only field you must type yourself. Without it, saving shows “Scheduler name is a required field.”
Add what it should run
Use the buttons above the run list (next section). The heading shows Run list (n).
Check where and against what it runs
Web: the start page and Environment (Start page and environment). All: the Run Environment (Where it runs). Leave Period on Real-time for now.
Save
Click Save, or Save & Execute to save and start a run (Run now).
“name updated successfully”. The pipeline appears in the Pipelines list with “n items”.
What a new pipeline starts with#
| Field | Starts as |
|---|---|
| Name | Empty |
| Period | Real-time (no timer) |
| Start Date Time / End Date Time | Now / three months from now |
| Start page (web) | The start page you last used, otherwise the project’s first one |
| Environment (web) | The environment you last selected, otherwise TEST. If the start page has no address for it, the first one that has: TEST, then DEV, then PRP. |
| Run Environment | Web: Run on Server. Mobile and desktop: your own agent, if you have one; otherwise the server option (desktop then switches to your agent, see Desktop). |
| Test Management, AI Options, e-mail and browser settings | A copy of the project’s preferences at that moment. Change them per pipeline afterwards (Parameters & run settings). |
Add test cases, requirements or pipelines#
| Button | Adds | How |
|---|---|---|
| Add Test Case | Test cases from the Automate tree | The Test Case List opens. Filter by name, click a case to see its steps, tick cases or a whole folder, then click Add to pipeline (n). Double-clicking a row adds it at once. Cases already in the pipeline show In pipeline. |
| Add Requirement | Requirements; the run executes the test cases linked to them | The Requirements List opens, with a name filter and a severity filter (Critical, High, Medium, Low). Tick requirements or a folder, then Add to pipeline (n). |
| Add Pipeline | Another pipeline as one row | Choose a Project, then a Pipeline, then Add. See Sub-pipelines. |
- Test cases or requirements, not both. While the pipeline has test cases, Add Requirement is disabled (“Cannot add requirements when test cases are present. Remove test cases first.”), and the other way round. Sub-pipelines can be added to either kind.
- Each test case once. Adding it again shows “name is already added to this pipeline.” To run a case several times, use the repeat count in Data & loop.
- Adding is not saving. Rows you add are kept when you click Save. Leaving the page first asks “Are you sure to exit without saving?”, with Save and Exit.
Set the run order#
The run list shows rows in the order they run. With two or more rows it says “Drag to reorder.” Drag a row by its handle (the six dots on the left) and drop it. The list then renumbers 1 to n; the change is kept when you save.
- Phases group the list. Rows are always shown, and run, as Setup → Before → Test → After → Teardown. Inside each group your drag order counts. A row dropped into another group goes back to its own group; change its phase instead.
- Test cases, requirements and sub-pipelines share one order. A sub-pipeline placed second runs second.
- One after another. The cases of a run execute in this order, each after the previous one has finished. Cases that need something prepared belong after the case that prepares it, or in Setup.
Each row shows the case’s last run status icon, its name (long names are cut at 40 characters; hover for the full name), the Same session toggle, the phase chip and, on hover, Detail (its steps and parameters) and Remove.
Setup, Before, After and Teardown#
Every row has an execution phase. A row with no phase is a normal Test; its chip appears only on hover. Click the chip to choose another phase. The menu explains: “Setup → (Before → Test → After) for each test → Teardown. If Setup fails, tests are skipped; Teardown always runs.”
| Phase | Runs | Typical use |
|---|---|---|
| Setup | Once, at the start of the run | Log in, create the test customer, load test data |
| Before | Before each test | Open the start screen, reset a filter |
| Test | Once per repeat | The checks themselves |
| After | After each test | Close dialogs, log the state |
| Teardown | Once, at the end of the run | Delete test data, log out |
What happens when a phase fails#
- Setup fails: every test is skipped. Teardown still runs.
- Before fails: that test is skipped and its After runs. With Continue On Failure off, the remaining tests are skipped too.
- A test fails with Continue On Failure off: the remaining tests are skipped; this test’s After and the Teardown still run.
- After fails: the run goes on.
- You stop the run: the case that is running finishes, then only Teardown cases run (Stop a run).
Setup, Before, After and Teardown cases are never repeated by the repeat count; only Test rows are.
Setup     Log in as admin; create customer "QA Test 01"
Before    Open the customer list
Test      Edit customer address
Test      Block customer
Test      Export customer list
After     Clear the search box
Teardown  Delete customer "QA Test 01"

Runs as:  Setup
          Before → Edit address  → After
          Before → Block         → After
          Before → Export        → After
          Teardown                         = 11 case runs
How the 11 is counted: Total case runs.
Before and After need at least one Test
Before and After run only around Test rows. A pipeline whose rows are all Before or After can be saved but cannot run. The run list says: “Before/After cases run only around Test cases. This pipeline has no Test case, so it can be saved but cannot run. Add a Test case or change the phase (e.g. Setup/Teardown).” Fix it.
Video transcript
Four cases in the run list. By default every row is a normal Test. Hover a row and click its phase chip. Five phases: Setup once at the start, Before and After around each test, Teardown once at the end. The login becomes Setup. If Setup fails, the tests are skipped. The clean-up becomes Teardown. It always runs: after a failed test, and after a stopped run. The list groups itself: Setup first, tests in the middle, Teardown last. Save & Execute starts the run. In the report the tabs follow the run order: Setup, the tests, then Teardown. Teardown ran last and removed what the tests created.
Continue in the same browser session#
By default each case opens a fresh browser at the start page. Turn on Same session on a row and that case “Continues in the previous case’s browser (no new browser, no start page).” The row then shows Same session; click it again to turn it off.
- Use it for a flow split into cases: log in, then add to basket, then pay, each with its own result.
- It works in web projects.
- A retry always starts a new browser at the start page. If the previous browser has closed, a new one opens.
- The hand-over does not cross a sub-pipeline: each sub-pipeline starts its own browser.
Run another pipeline inside this one#
Add Pipeline adds a whole pipeline as one row. Use it to build a regression pipeline out of smaller ones, or to reuse another project’s login or data setup.
Add it
Click Add Pipeline, choose the Project (this one or another you can open), then the Pipeline, then Add. The pipeline you are editing is not offered. A pipeline that is already a row is not added twice.
Adjust its values
Click Edit Pipeline Parameters on the row to change, for this parent only, the values its steps type. The other pipeline is not changed.
Place it
Drag it into position. A sub-pipeline row can be Test, Setup or Teardown, never Before or After, and it does not count as a Test for Before and After.
- It runs its own run list with its own repeat counts. Its case runs appear in this pipeline’s report.
- When runs wait for a SmartestQA server, a sub-pipeline’s run goes first and to the server that runs the parent (Server queue).
No loops
The picker hides only the pipeline itself. If A contains B and you add A to B, both run each other. Keep sub-pipelines in one direction: small pipelines inside bigger ones.
Save and Save & Execute#
| Button | Does | Enabled when |
|---|---|---|
| Save | Saves the run list and every tab. A Period other than Real-time also (re)registers the timer. | Name filled; web: a start page with an address for the chosen environment; Run on Your Agent: at least one agent ticked. Hover a disabled button for “Required: Name, Start Page URL”. |
| Save & Execute | Saves, then starts one run now, whatever the Period. | As Save, plus at least one test case, requirement or pipeline (“Required: Test Case, Requirement or Pipeline”). |
Under the buttons a small line shows who created and who last updated the pipeline, and when. The History icon and View Reports sit on the left of the same row (History).
Tag a pipeline#
Under Run Environment on the Schedule tab, click the tag icon next to Tags (Edit Tags) to add or remove tags. “No tags yet.” means none are set. In the Pipelines list, Filter By Tags includes or excludes pipelines by tag, and AI assistants list pipelines with their tags.
Delete a pipeline#
Hover the row
In the Pipelines list, hover the pipeline (or focus it with the keyboard) and click the Delete icon.
Confirm
“Pipeline "name" will be deleted. Continue?”
“name deleted from the Pipeline List”. Its timer is removed, so it no longer appears on Scheduled Runs.
- Who: Admins and the person who created the pipeline. Others see “name could not be deleted”.
- To stop a schedule but keep the pipeline, set Period to Real-time and save (Pause a schedule).
- If other pipelines use it as a sub-pipeline, remove those rows first.
If something goes wrong#
Didn’t find your answer?Write to support with your project name and what you see on screen.
info@smartestqa.ai