- Docs
- Get started
- Quick Start
- Run your first test
Run your first test
Create a first test, try it with a dry run, then run it in a pipeline so it shows up in Report.
In short
On this page you can
- Choose one of five routes to a first test, from recording to AI agents.
- Record a web test in Automate with the browser extension.
- Try it with Dry Run on the server or on your agent.
- Run it in a pipeline so it appears in Report.
- Understand why dry run results are not saved to reports.
How to use it
- Open First Test Case in Automate, or click New Test Case.
- Pick a Start Page URL and environment, click Record and do a short flow.
- Close the recording tab, name the test case and click Save.
- Click Dry Run and choose Run on Server or Run on your Agent.
- In Schedule, add it to a pipeline, click Save & Execute and open Report.
Create your first test#
There are five ways to get a first test. The setup guide calls them routes; finishing any one of them completes the Teach your app step.
| Route | Best for | What you do |
|---|---|---|
| Record it yourself | A first test in minutes; people who know the app | Map pages with Discover Your App, then record a test case in Automate. |
| Write steps with the AI Assistant | Describing a flow in plain language | Create a test case and let the AI Assistant write its steps. |
| Start from documents or screenshots | Teams with analysis documents or specs | Upload documents or screenshots in Analyze and review the generated test cases. |
| Use your code assistant (MCP) | Developers with Claude or another MCP client | Connect the assistant (Test Agents › Connect to Claude), open the code repository and ask it to build the suite. |
| Let AI agents explore | Broad first coverage with little effort | Run an autonomous agent and approve the drafts it writes. |
Record a web test#
Open the test case
Go to Automate and open First Test Case, or click New Test Case.
Pick environment and start page
Choose a Start Page URL and an environment. Without both, recording does not start (“Please select a Start Page URL.”).
Record
Click Record. Your app opens in a new tab and the extension adds every click, typed value and selection as a step. Log in and do the flow the way a user would.
Finish and come back
Close the recording tab and return to SmartestQA. The steps appear in the list.
Name and save
Give the test case a name and click Save. You do not have to write a description: the AI writes one from the steps.
The test case shows your steps, each one linked to an action in Discover.
Record a short, complete flow first
Login, open one screen, check one value. Five to ten steps. A short test that passes teaches you more than a long one that fails at step 37.
Record with test data only
Recording saves screenshots of the controls you use, and the values you type are saved in the steps. Use a test user and test data. Never record with real customer data or a personal password.
Run it and read the report#
There are two ways to run a test, and only one of them leaves a report.
| Dry Run | Pipeline run | |
|---|---|---|
| Start it from | AutomateDry Run | Schedule: a pipeline, with Save & Execute or a timer |
| Use it for | Trying a test while you build it | Runs you want to keep, share and compare |
| You see | A live log while it runs | The live log, then a full report |
| Saved in Report | No: “Dry Run results are not saved to reports.” | Yes, with screenshots, video and logs |
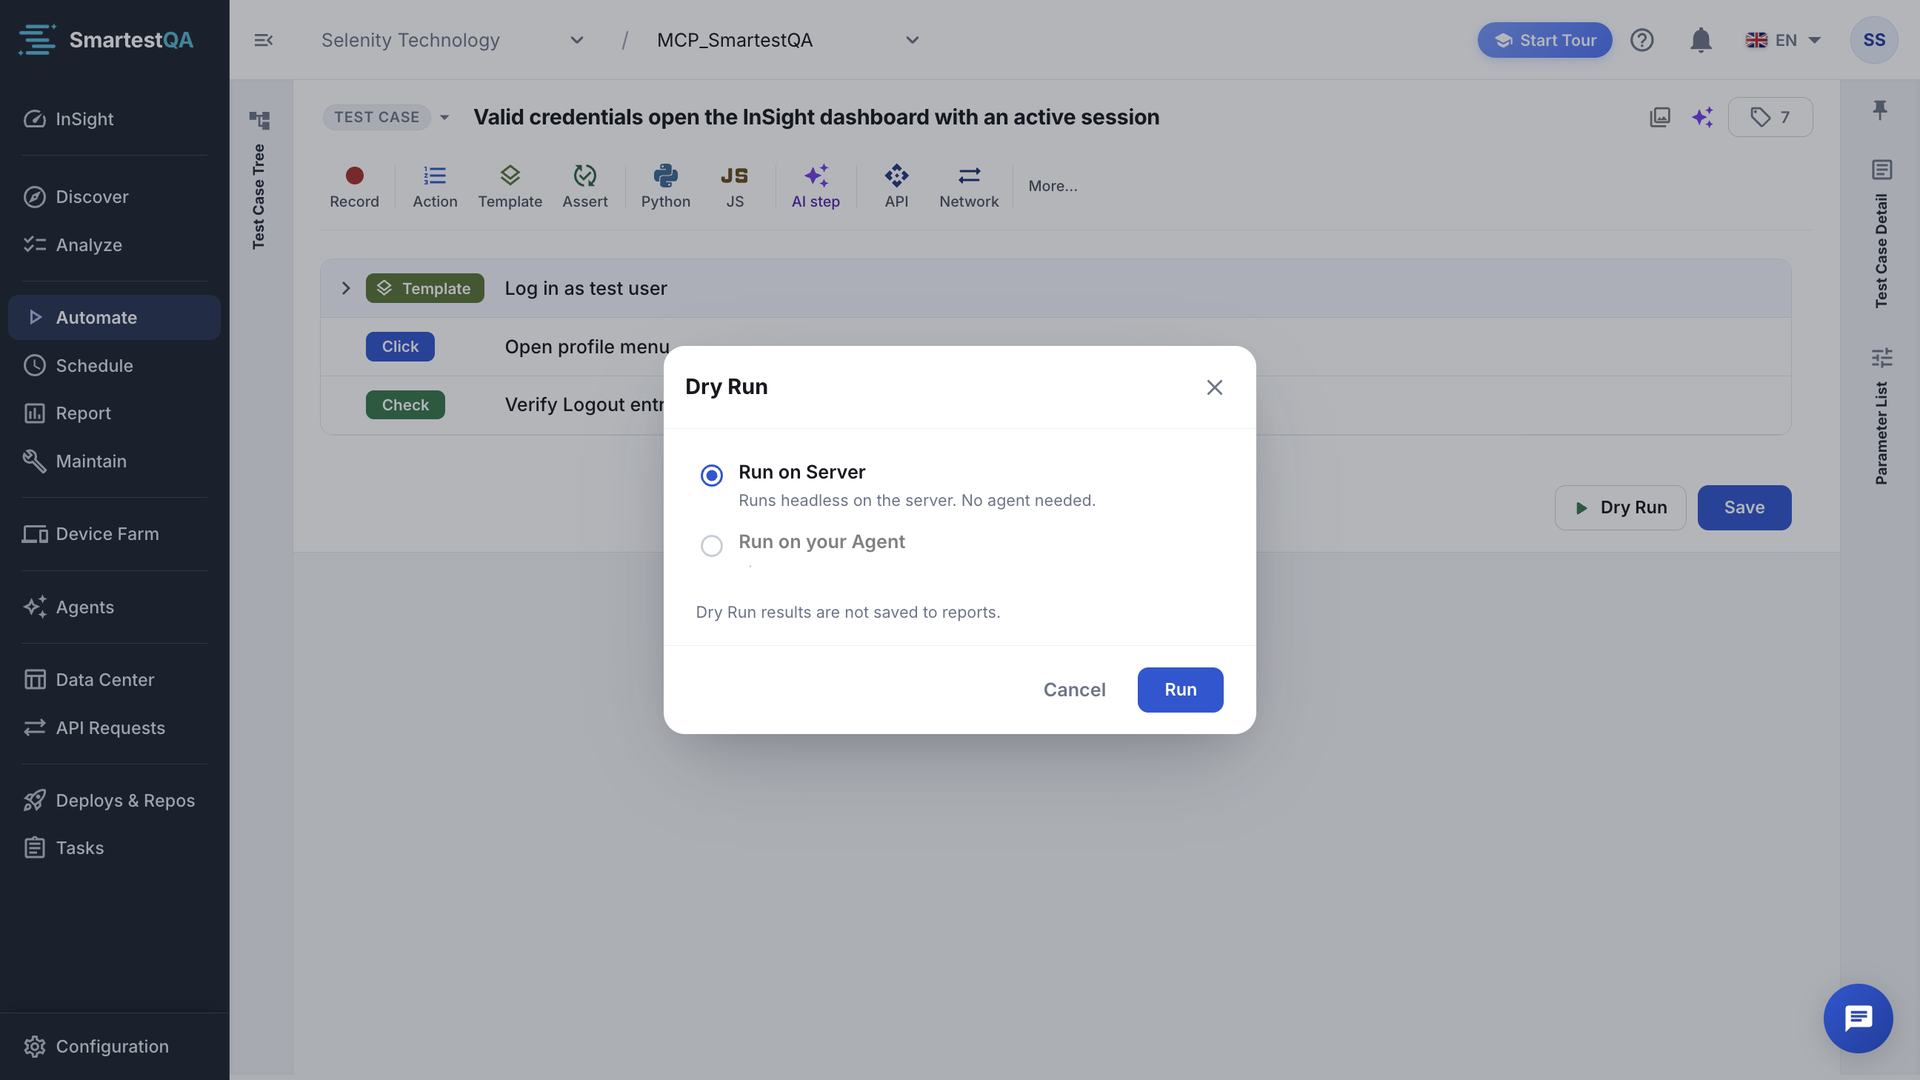
Dry run
In Automate click Dry Run and choose the run target: Run on Server (headless, no agent needed) or Run on your Agent (on your computer; you can watch the browser). Watch the live log.
Put it in a pipeline
Go to Schedule, create a pipeline, give it a name, add your test case and click Save & Execute.
Read the report
Open Report. Each run lists its test cases and steps with status, screenshots, video and logs.
You have a passing, reported test. The Run & report step of the setup guide is done.
Didn’t find your answer?Write to support with your project name and what you see on screen.
info@smartestqa.ai