Write requirements
A main requirement describes one feature or user flow; its sub-requirements are the conditions a test can prove. This page covers writing both by hand, with AI help for the sub-requirements.
In short
On this page you can
- Create a main requirement in a folder with New Requirement.
- Add sub-requirements by hand or with Generate (AI, 3–5 proposals).
- Set Status, Severity, Assignee and dates for the main and for each sub.
- Tag requirements and discuss them in Comments with @mentions.
- Save everything in one go and avoid losing unsaved edits.
How to use it
- Select a module folder and click New Requirement.
- Type Name and Description, then click Save.
- Under Sub Requirements, click Add or Generate.
- Fill each sub’s Status and Severity in Detail.
- Click Save again: subs, links and fields are stored together.
Create a main requirement#
Select the folder
Click the module folder (or a sub folder in it) in the tree. Requirements cannot go into Documents.
Click New Requirement
An empty main requirement is created there and selected: “Requirement added successfully”. It already counts toward your licence’s requirement limit.
Write Name and Description
Name the flow, verb first:
Pay with a saved card. In Description say who does what and why, in two or three sentences. Both are required.Add tags (optional)
Click the tag field to pick or create tags. Two tags are shown, the rest as +n. Tags feed the tree filter.
Save
Click Save.
“Requirement saved successfully”. The tree shows the new name.
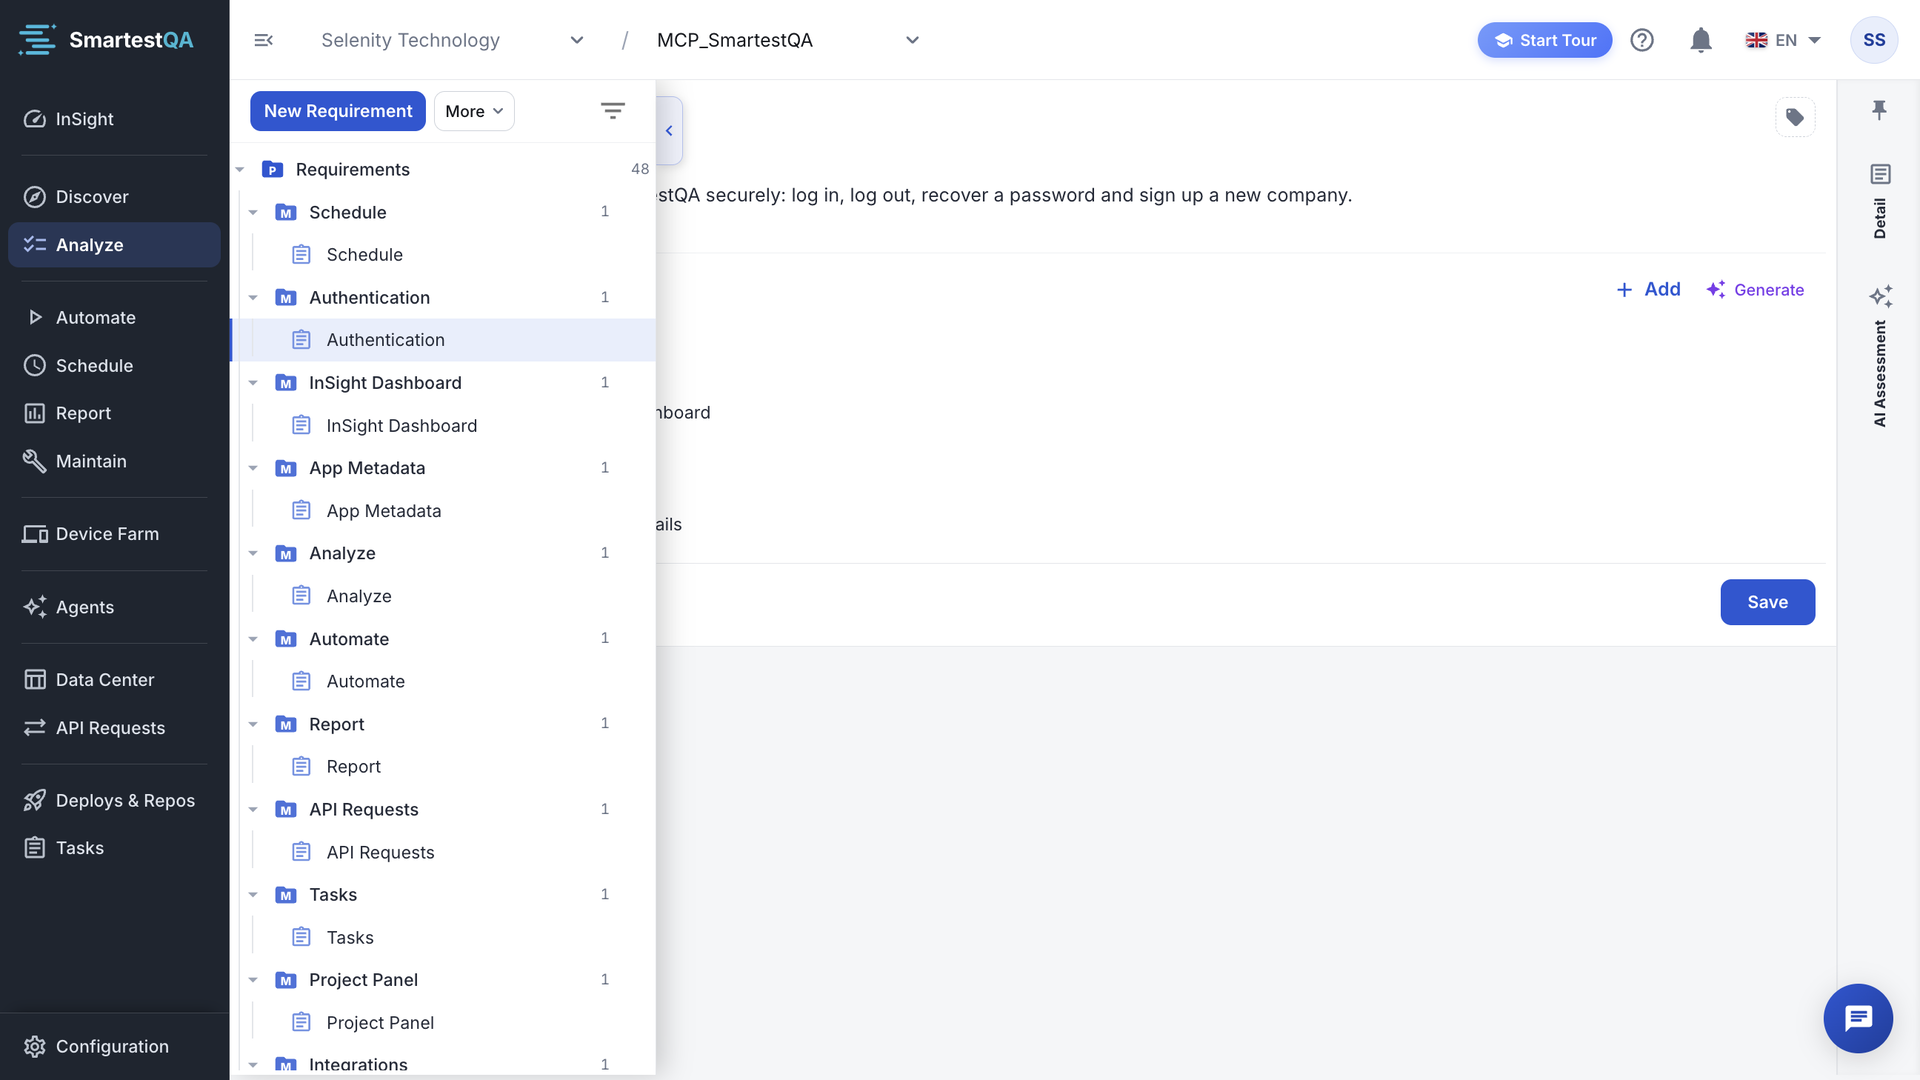
Fields#
The centre holds Name, Description and Tags. The right panel’s Detail tab holds the rest, for the main requirement or for the sub-requirement you selected.
| Field | Values | Notes |
|---|---|---|
| Name | Text, required | Up to 255 characters. |
| Description | Text, required | The AI features read it: write the goal and the rules, not just a title. |
| Tags | Project tags | Stored on the main requirement. |
| Status | New, Assigned, Implemented, Closed | Default New. You set it; nothing changes it automatically. |
| Severity | Low, Medium, High, Critical | Default Medium. High and Critical sub-requirements count as risky in InSight › Test Health. |
| Assignee | A user of the project, or Unassigned | The assignee of a main requirement is notified: “A requirement has been assigned to you”. |
| Start Date, End Date | Dates | Start Date cannot be in the future and cannot be after End Date. |
| Created by, Updated Date, Updated by | Read-only | Filled by SmartestQA. |
Add sub-requirements#
A sub-requirement is one condition and its expected result. Test cases link to sub-requirements, not to the main, so a main requirement without subs cannot be traced to tests.
Open the dialog
Under Sub Requirements, click Add. The dialog Add Sub Requirement opens.
Fill it in
Name and Description are required; Save stays disabled until both are filled. Status, Severity, Assignee and dates are optional.
Save the dialog
The row appears with the tag new and the message “sub requirement added”. It is not stored yet.
Save the main requirement
Click Save in the centre. All new, changed and removed subs are stored in one go.
- Reorder by dragging rows. The order is kept and pipelines run the subs in this order.
- Row actions: Automate (AI test cases, see Generate test cases; available once the sub is saved), Edit, Delete.
- Select a row to show that sub’s Detail and test cases on the right. Main Requirement above the fields takes you back to the main view.
Generate sub-requirements with AI#
Save the main requirement first
Generate is disabled on an unsaved main (“Please save the main requirement first”), and the AI needs a Description (“Requirement description is required”).
Click Generate, then Analyze
The dialog Generate Sub Requirements shows the main requirement. Click Analyze. The AI reads the Name and Description and proposes 3–5 sub-requirements.
“n sub requirements generated”, all ticked.
Pick and add
Untick the ones you do not want, then click Add. They join the list as new.
Review and save
Edit names and descriptions where needed, set Severity, and click Save.
What the AI uses here
Only the main requirement’s Name and Description. For proposals that know your pages and rules, use the AI wizard with a Target scope instead.
What a good requirement looks like#
Write a main requirement as a user flow, and each sub-requirement as one condition with one observable result. That is also how SmartestQA’s AI tools are told to write them.
Main  Reset a forgotten password
      A signed-out user can set a new password through an emailed link.

Sub   A registered email receives a reset link within one minute        Severity High
Sub   An unknown email shows the same confirmation (no account leak)     Severity Critical
Sub   A link older than 24 hours shows "Link expired"                    Severity Medium
Sub   The new password must meet the password rules; errors are shown    Severity Medium
Sub   After the reset, the old password no longer signs in               Severity High
Do
- One main requirement per user flow, with about 3 to 8 subs.
- Give each sub a result you can see or check.
- Add the error and edge cases as their own subs.
- Use the words of the app and of your Notes.
Don’t
- Copy document headings as requirements.
- Put two conditions in one sub (“…and also…”).
- Write subs that only repeat the main’s name.
- Leave Severity at Medium for everything.
Saving and leaving#
- Save stores the main requirement, all its sub-requirements and their test case links together. Until then, every change is only on your screen.
- If you leave with unsaved changes, SmartestQA asks “Are you sure to exit without saving?” with Exit without saving, Cancel and Save and Exit.
- If the save changed which test cases the requirement has, and the requirement is in a pipeline, the dialog Update Scheduler Parameters offers to sync those pipelines. See How links reach pipelines.
A removed sub-requirement is deleted for good
Comments#
Open Comments at the bottom of the right panel. Comments belong to the main requirement.
- Write in Write a comment... and click Send. Bold, italic, lists and quotes are available.
- Type @ to mention a team member (“Type @ to mention a team member”).
- You can edit and delete only your own comments.
Video transcript
New Requirement adds an empty requirement to the tree and opens it. Name it after what the user can do. In Description, say who it is for and what they get. Add opens a sub-requirement: one rule, written so that it can be tested. Add one for each rule, including what must not happen. Generate proposes sub-requirements with AI from the name and description. Save. The requirement takes its name in the tree, with its sub-requirements listed.
If something goes wrong#
Didn’t find your answer?Write to support with your project name and what you see on screen.
info@smartestqa.ai