- Docs
- Resources
- API Requests
- The API library
The API library: collections, folders and imports
The tree on the left of API Requests is the project’s API library. This page covers creating and organizing requests and bringing in existing ones from Postman, Swagger / OpenAPI or curl.
In short
On this page you can
- Create requests, collections and folders in the API tree.
- Rename, duplicate, move by drag and drop, and delete items.
- Import a Postman collection JSON file.
- Import a Swagger / OpenAPI spec from a file or a URL.
- Turn a curl command into a filled request by pasting it.
How to use it
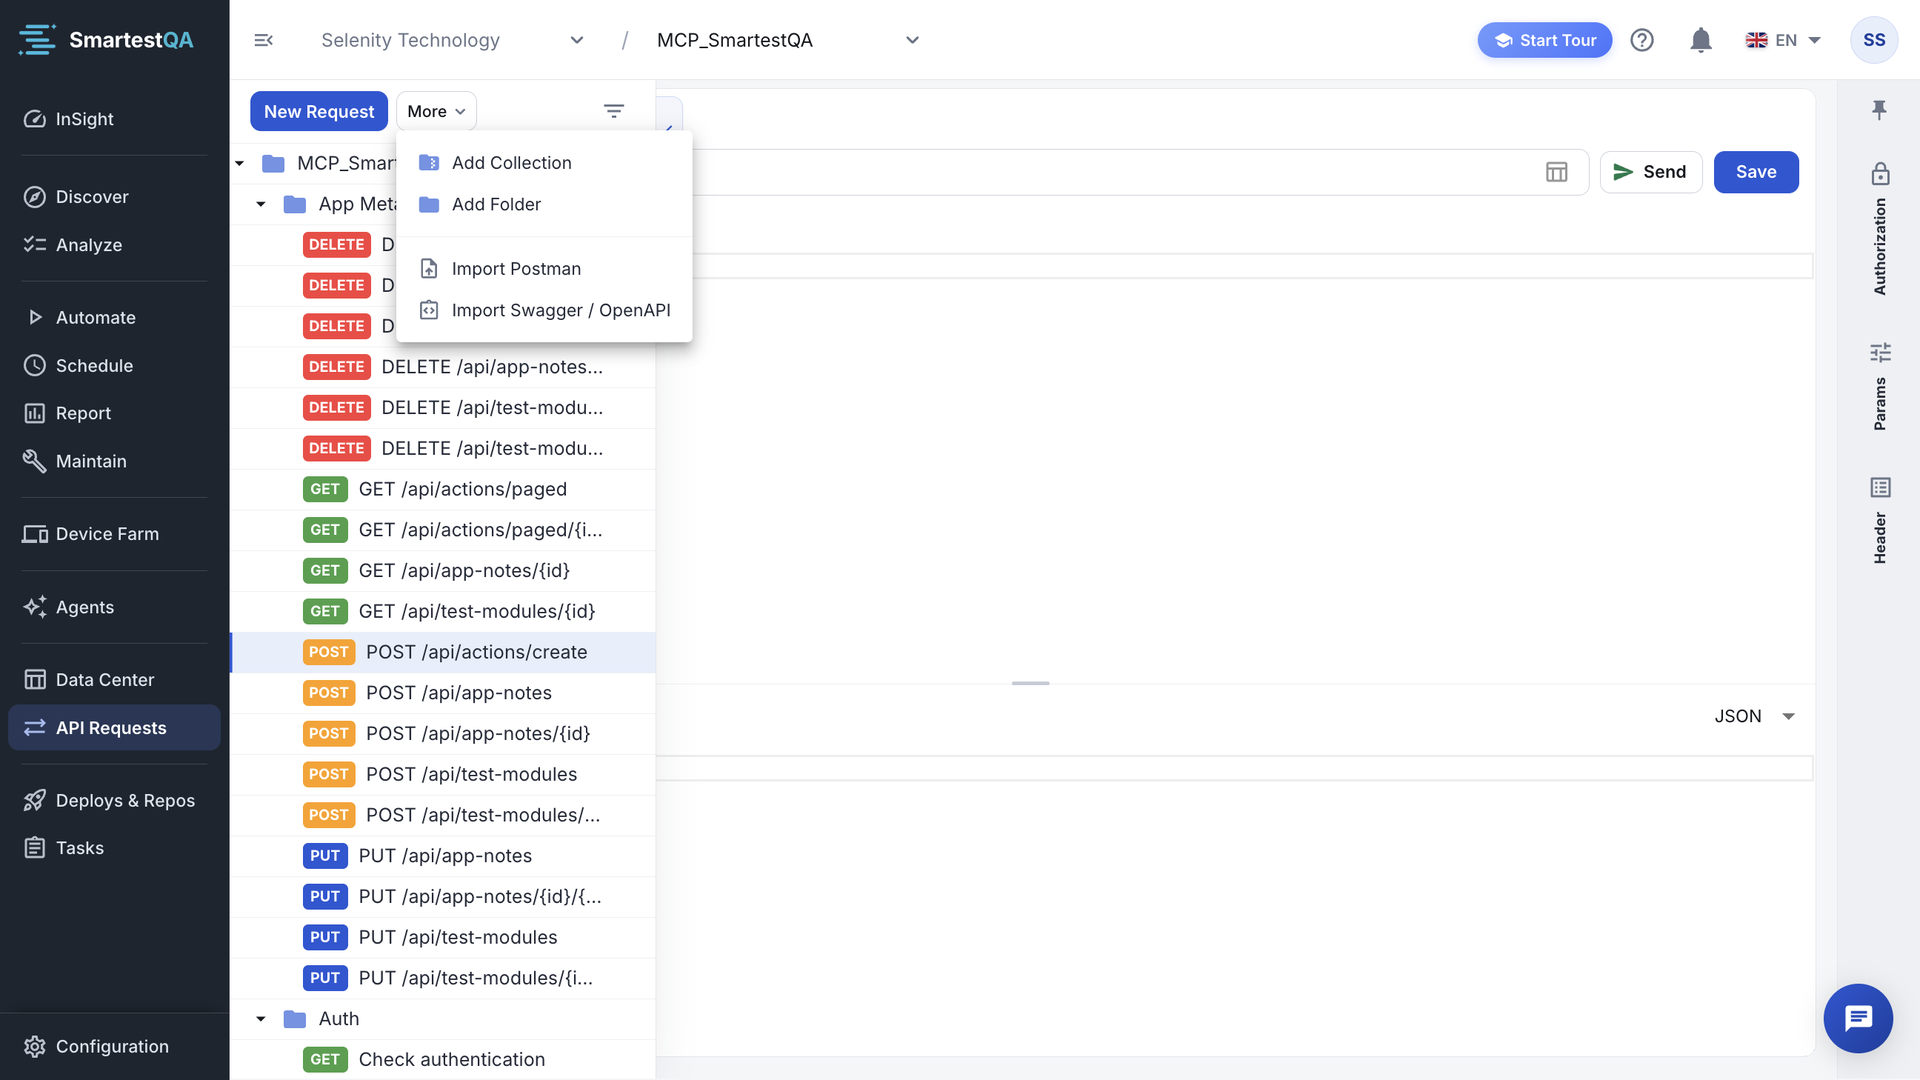
- Click More › Add Collection and name the collection.
- Select it and click New Request, or use the item menu › Add Request.
- Or import: More › Import Postman or Import Swagger / OpenAPI.
- Paste a curl command into Request URL to fill a request.
- Drag requests into folders; use the item menu to rename or duplicate.
Create a request#
Pick where it goes
Select a collection or folder in the tree. With nothing selected, the request goes to the top of the tree.
Click New Request
Click New Request above the tree, or Add Request in a collection’s or folder’s menu. The request is created as “New Request” (“New Request 1”, “New Request 2”… when the name is taken there) and opens in the middle.
Name it
The new name is ready to type in the tree. Later, click the name at the top of the request to change it, for example to “Create order”. Enter or leaving the field saves the name at once (“Name updated successfully”); Esc cancels. An empty name is not accepted.
Fill and save
Choose the method, enter the URL and body, then click Save. See Edit and send a request.
“API data saved”. The tree shows the request with its method chip.
Collections and folders#
- Collection: More › Add Collection. Collections stay in the order they were created.
- Folder: More › Add Folder, or Add Folder in a collection’s or folder’s menu. Folders and requests are sorted by name.
- Item menu: hover an item and click its menu (“Drag to move • Click for options”): Add Folder, Add Request, Rename, Duplicate (requests only), Delete.
- Search: the filter icon searches request, folder and collection names (“No match found for search”).
- Collection or folder selected: the middle shows “Collection selected” or “Folder selected”, the number of items (Content: n items), and a hint to set its authorization; see Inherited authorization.
Duplicate#
Duplicate on a request creates “name Copy” next to it with the same method, URL, headers, parameters, body and authorization. Collections and folders cannot be duplicated.
Move#
Drag a request or folder onto a collection or folder to move it inside. Drop it on a request to move it next to that request. Collections and the top folder cannot be moved; a folder cannot be dropped into its own sub folder. A failed move shows “Error during update.”
Delete#
- Item menu › Delete: “Delete "name"?” and “This action cannot be undone.”
- Deleting a folder or collection deletes everything inside it. If it is not empty, only an Admin can delete it; others see “Folder name could not be deleted.” or “Collection name could not be deleted.”
- API steps that were made from a deleted request keep working: each step has its own copy. See Each step keeps its own copy.
Import a Postman collection#
Export from Postman
In Postman, export the collection as a JSON file. The file must contain the collection’s
infoanditemparts.Open the import
More › Import Postman. The dialog Postman Collection Import opens: “Select your Postman collection JSON file”.
Pick the file and import
Click Select File (only
.json), then Import.“n/total requests imported successfully!” A new collection with the Postman collection’s name appears.
| From Postman | Becomes |
|---|---|
| Collection | A new collection (“Imported Collection” when it has no name) |
| Folder | A folder |
| Request | A request with method, URL, query parameters and headers |
| Body: raw, form-data, x-www-form-urlencoded | The body or form-data rows |
| Auth: Basic, Bearer | Basic Auth, Bearer Token; anything else None |
Variables such as {{baseUrl}} | Kept as text |
Postman variables are not imported. A run reads a name without prefix from Data Source only when the reference is the whole value, so {{baseUrl}}/users is not filled (resolution order). Create a key baseUrl in Variables and replace {{baseUrl}} with {{ds:baseUrl}}. Send on this page does not fill {{baseUrl}}; see What Send sends.
Import a Swagger / OpenAPI spec#
Open the import
More › Import Swagger / OpenAPI. The dialog Import from Swagger / OpenAPI has two tabs.
Give the spec
- URL: the Swagger JSON URL, for example
https://api.example.com/v3/api-docs. “Use the JSON endpoint, not the Swagger UI page”. The spec is downloaded by the SmartestQA server, so CORS is usually not a problem. - File Upload: a JSON or YAML file (
.json,.yaml,.yml), processed on the server.
- URL: the Swagger JSON URL, for example
Import
“Imported n/total endpoints successfully!” A collection with the API’s title appears, with one folder per tag.
| From the spec | Becomes |
|---|---|
| API title | The collection name |
| First tag of an operation | The folder it goes into (none: the collection itself) |
| Summary, else operationId, else “METHOD path” | The request name |
| Server URL + path | The URL |
| Path parameters | Their default value in the URL, or the placeholder {id} when there is none |
| Query and header parameters | Params and Header rows with their default values |
| Request body schema or example | An example JSON body and Content-Type: application/json |
Security schemes are not imported: set the authorization on the collection afterwards. Replace placeholders such as {id} with a value or a reference like {{tc:orderId}} before you send.
Paste a curl command#
Paste a curl command into Request URL (placeholder “Enter URL or paste text”). SmartestQA recognizes it and fills the request: “Curl imported.”
curl -X POST 'https://test.shop.example.com/api/orders?source=web' \
  -H 'Content-Type: application/json' \
  -H 'Authorization: Bearer eyJhbGciOi…' \
--data-raw '{"productId": 42, "quantity": 1}'| curl | Becomes |
|---|---|
-X / --request | The method. Without it: POST when there is data, else GET (-G forces GET). |
| The URL | The URL, query string kept; the query is also listed under Params |
-H | Header rows |
-d, --data, --data-raw, --data-binary, --data-urlencode | The raw body (several are joined with &) |
-F / --form | form-data rows |
-u user:pass or Authorization: Basic … | Basic Auth |
Authorization: Bearer … | Bearer Token |
-s, -L, -k, -i, -v, --compressed and similar | Ignored |
Replace pasted tokens
A curl copied from the browser carries a real token. After pasting, replace it with {{ds:apiToken}} from an encrypted key. A Basic login becomes Basic Auth, which a test run does not apply; see Authorization in runs.
In Automate you can also create a request and its step in one go with Create from curl; see From a curl command.
If something goes wrong#
Didn’t find your answer?Write to support with your project name and what you see on screen.
info@smartestqa.ai